Suspension Deep Dives
- Posted on
Suspension can seem like one of the most mysterious things to set up on a mountain bike. With words like "SAG", "compression adjustment", "rebound rate" and "leverage ratios", it can be a lot to process, whether you're just picking up your first mountain bike or you've been riding for years. Let us help break things down for you!
This is intended to be a guide for understanding how suspension works along with adjusted to suit you, and it is not uncommon for you to stray from the recommended guidelines a bit depending on your riding style, terrain, and what feel you are looking for out of the bike.
Suspension set up
The most important part of suspension set up is "SAG", which stands for static ride height, and is measured as you are standing on the bike in the "attack" position, like when you would be descending. Depending on what type of suspension the bike uses, the way to adjust SAG will be adding/removing air pressure if you have an air fork or shock, or changing the coil spring if you have a coil shock.
We will focus on setting SAG for air shocks and forks, as coil shocks are a bit trickier and depend much more on the suspension platform your bike brand uses. (Lost Co has a great tool for figuring out what spring to use!)
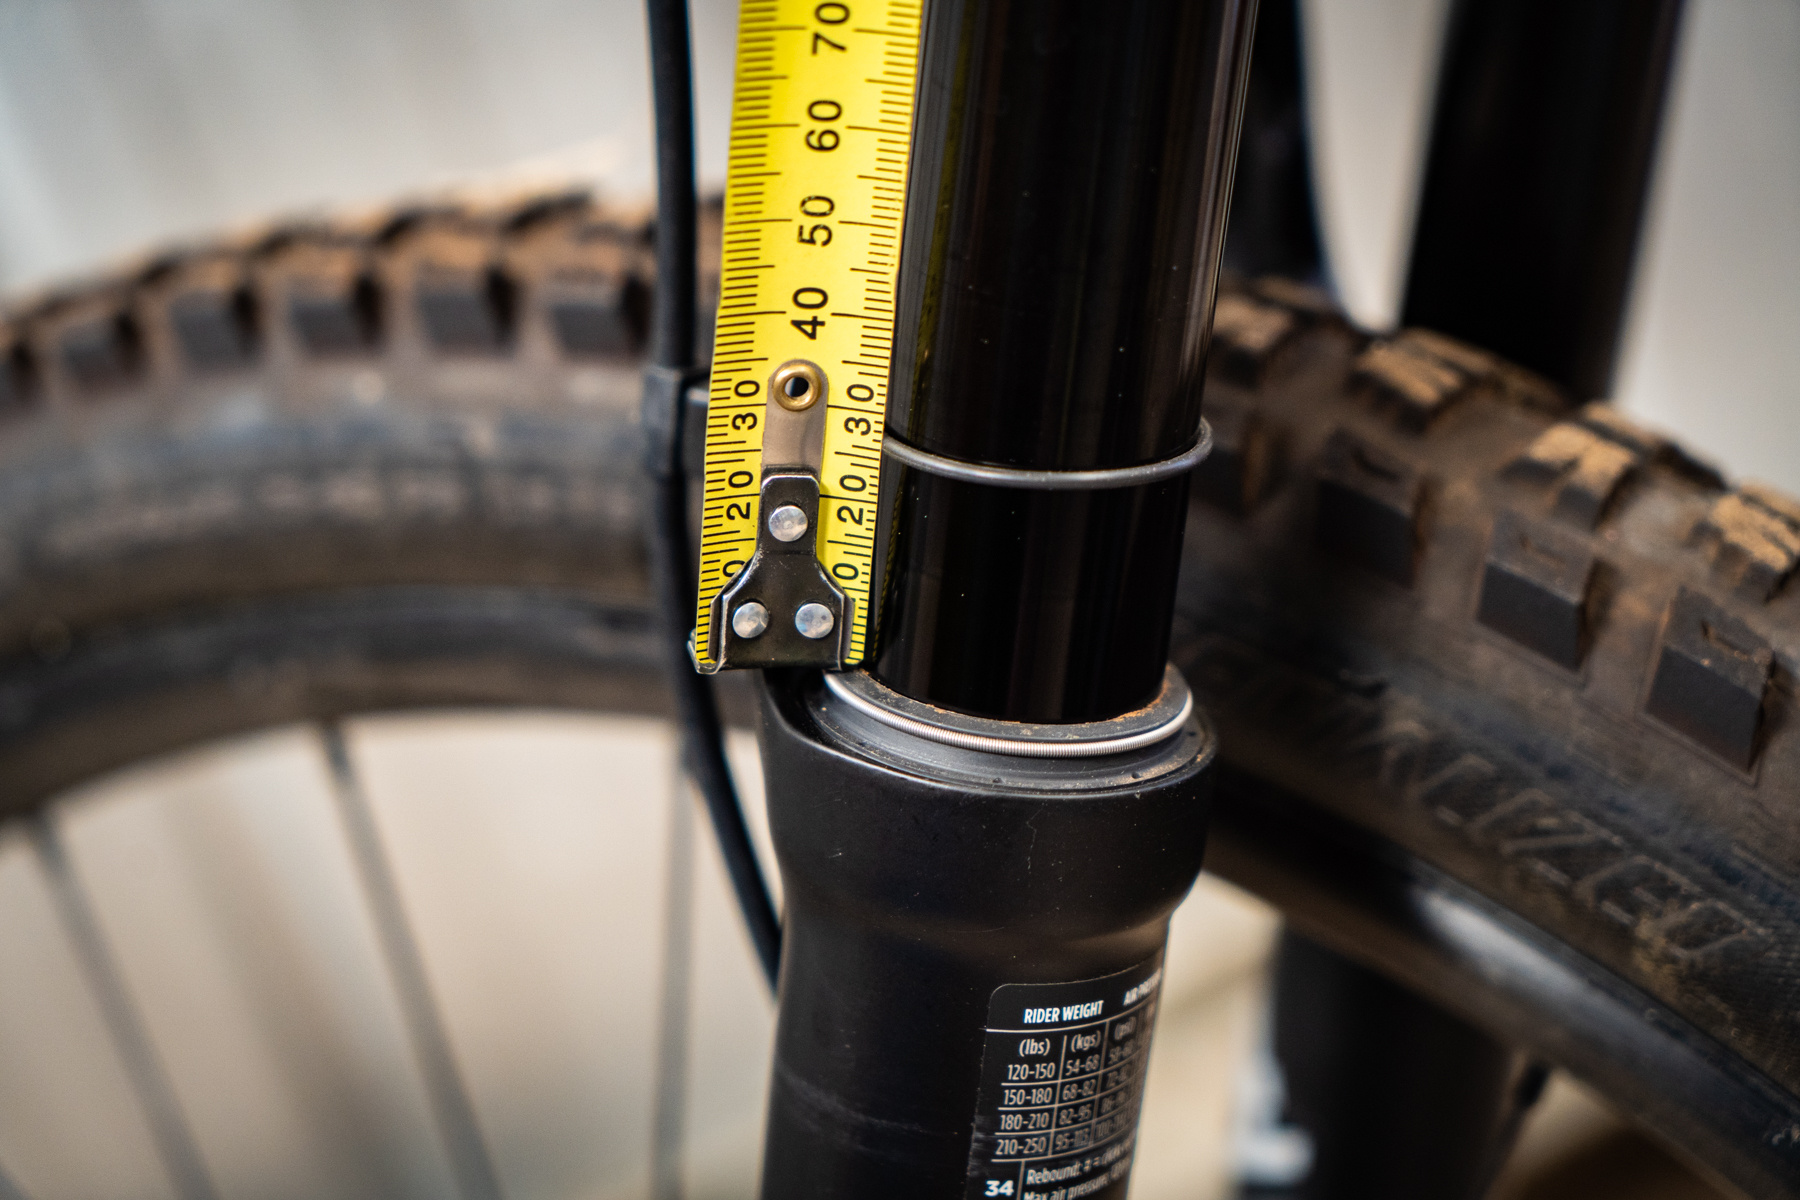
The first place to start is knowing how much travel your fork has, along with how long of a stroke your rear shock has. SAG is a percentage of travel use, usually 15-20% of your fork travel, and 25-30% of your rear shock travel. Below are images of a shock and fork, and the part to focus on is the stanchion, or the part that moves into the rest of the body of the fork/shock.

Inflate the shock to your body weight + riding gear, as that is an easy starting place for most bikes for shock air pressure. For the fork, some forks will have a chart with a recommended pressure, which we always use for setting up our bikes and test ride bikes. If your fork does not feature a chart, half your body weight will do as the starting pressure.
Next, find either a buddy or have a stand to hold you and the bike up. You will need to fully mount the bike, and stand up on the pedals. You will sink into the suspension, will need to measure how much of the fork/shock is being used while you are standing. Your suspension may have a small o ring on it, that is a helpful tool to as you can slide it against the shock/fork body while you are on the bike, and it will stay in place when you get off. From the shock/fork body to the o ring indicator is the amount of the suspension you are using at SAG.
You will measure how many millimeters of the stanchion on the fork/shock is being used and divide that by the overall stroke length (see images above to understand stroke length). That percentage will tell you how much SAG you currently have. Again, a good starting place is about 30% for the shock (or whatever the frame manufacturer recommends), and 15-20% for the fork.
Once you have set sag, rebound will be the next part to start tinkering with. Rebound is how fast the fork returns to full travel from being compressed. A slower rebound setting will keep the bike more planted, but can feel harsh. A faster rebound will keep the suspension more active, and track the ground very well, but can get things moving too fast and be a touch harder to control. This is more of a personal feel, some forks and shocks have recommended rebound clicks based off of the amount of air you have in the suspension.
Try starting your rebound in the middle of the setting, then all the way fast and all the way slow to get a feel for all the extremes and middle. It is always ok to tinker! Try a click or two, see how it feel and go back to the previous setting if it doesn't feel right.
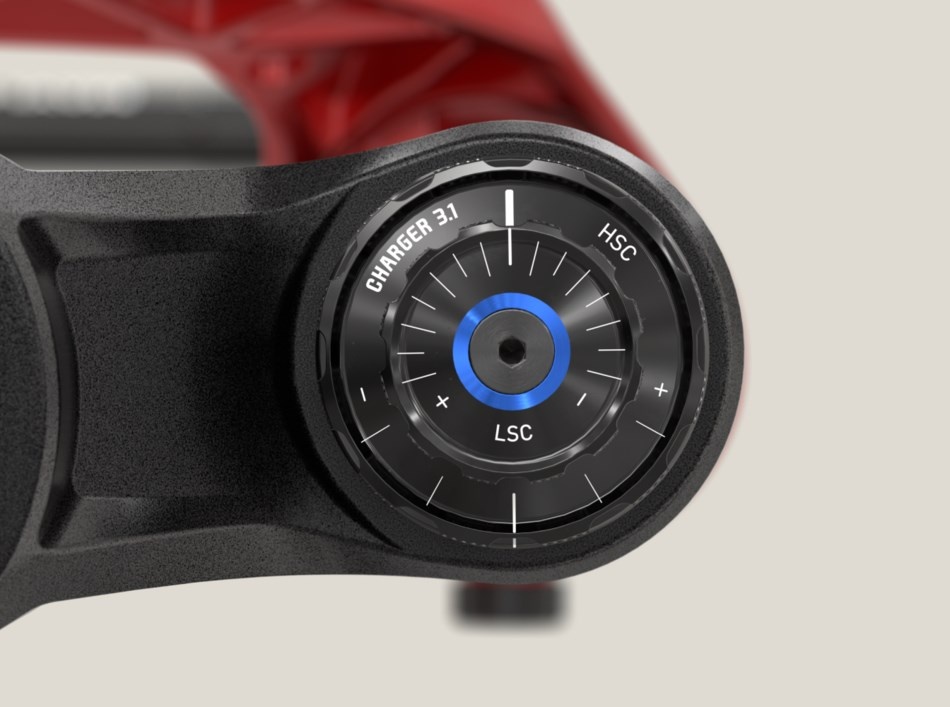
difference between high and low speed compression
Most forks will have some sort of knob that adjusts the "compression" of the fork. Compression is the adjuster on the suspension that prevents/restricts the movement of the suspension into its travel.
High/Low Speed Compression Dial
Lockout/Firm Switch

Adding compression, ie locking it, will make the suspension firmer. With a "lockout" the fork will be as rigid/firm as it can be when fully closed.
With a compression dial with high and low speed compression, it is a bit more complicated.
High speed compression (HSC) is how much your fork compresses on big, faster hits, think landing to flat off a drop/jump. "Adding", or firming up, your HSC will give you more support when landing those big events but can feel harsher.
Low speed compression (LSC) is for smaller compression movements. Think pumping into a roller, berm, or into the lip of a jump. "Adding", or firming up, your LSC will give you more to push against as you are "pumping" against those features, but could be harsher on a rougher terrain.
Try starting your compression in the middle of the setting, then all the way fast and all the way slow to get a feel for all the extremes and middle. It is always ok to tinker! Try a click or two, see how it feel and go back to the previous setting if it doesn't feel right.